Boot Camp Download for Mac Os X 10.6.8
Download and install Windows back up software on your Mac
Later using Kicking Camp Assistant to install or upgrade Microsoft Windows on your Mac, you might also need to install the latest Windows support software (drivers) from Apple.
Kicking Camp requires a Mac with an Intel processor.
When y'all install Microsoft Windows on your Mac, Boot Camp Assistant automatically opens the Boot Military camp installer, which installs the latest Windows back up software (drivers). If that doesn't happen, or you experience any of the following issues while using Windows on your Mac, follow the steps in this article.
- Your Apple mouse, trackpad, or keyboard isn't working in Windows.
Force Bear upon isn't designed to piece of work in Windows. - You lot don't hear audio from the congenital-in speakers of your Mac in Windows.
- The congenital-in microphone or camera of your Mac isn't recognized in Windows.
- One or more screen resolutions are unavailable for your display in Windows.
- Yous tin't adjust the brightness of your built-in display in Windows.
- You have issues with Bluetooth or Wi-Fi in Windows.
- Y'all become an alert that Apple Software Update has stopped working.
- You get a message that your PC has a commuter or service that isn't ready for this version of Windows.
- Your Mac starts up to a black or blueish screen after you lot install Windows.
If your Mac has an AMD video carte du jour and is having graphics bug in Windows, you might need toupdate your AMD graphics drivers instead.

Install the latest macOS updates
Format a USB flash drive
To install the latest Windows support software, you demand a 16GB or larger USB flash drive formatted every bit MS-DOS (FAT).
- Start your Mac from macOS.
- Plug the USB flash bulldoze into your Mac.
- Open up Disk Utility, which is in the Utilities binder of your Applications binder.
- Cull View > Evidence All Devices from the menu bar.
- From the sidebar in Disk Utility, select your USB flash bulldoze. (Select the drive name, non the volume proper name below it.)
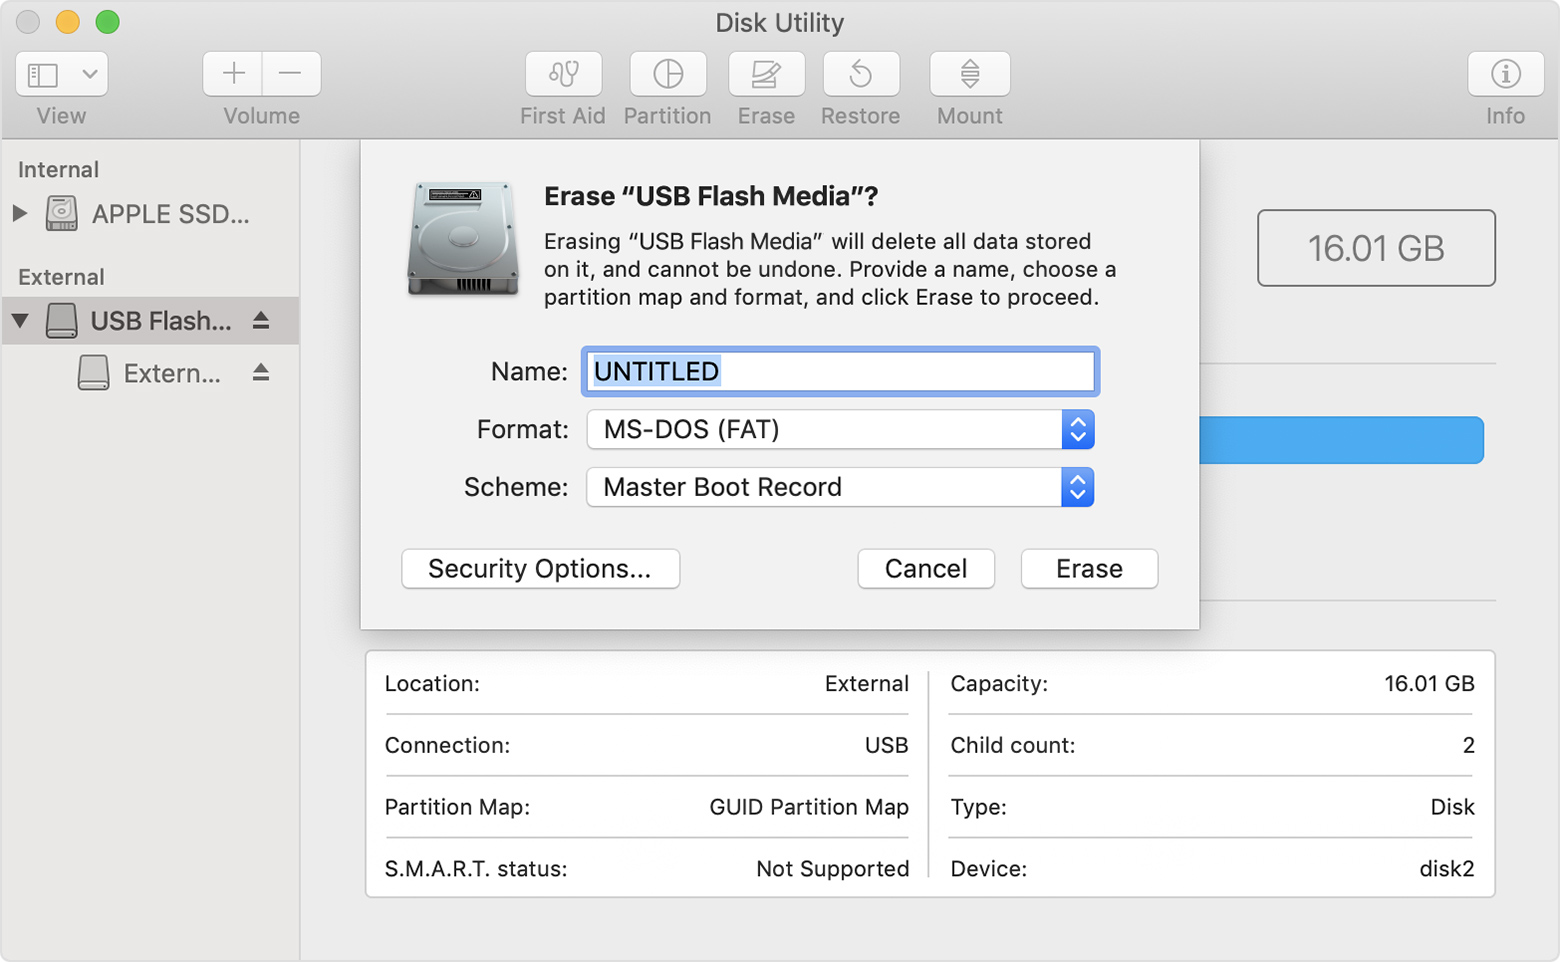
- Click the Erase button or tab.
- Choose MS-DOS (Fatty) as the format and Principal Boot Record every bit the scheme.
- Click Erase to format the drive. When done, quit Disk Utility.
Download the Windows support software
After preparing your USB flash drive, complete these steps:
- Make sure that your Mac is connected to the Internet.
- Open Boot Army camp Banana, which is in the Utilities binder of your Applications folder.
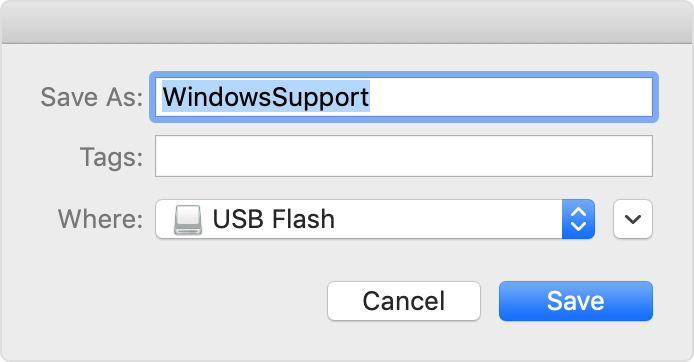
- From the menu bar at the acme of your screen, choose Action > Download Windows Support Software, then choose your USB flash drive as the relieve destination. When the download completes, quit Kick Army camp Assistant.
Learn what to practice if you tin can't download or save the Windows support software.
Install the Windows support software
Afterdownloading the Windows back up software to your flash drive, follow these steps to install the software. (If you're attempting to resolve problems with a Bluetooth mouse or keyboard, information technology might be easier to use a USB mouse or keyboard until these steps are complete.)
- Make sure that the USB flash drive is plugged into your Mac.
- Start up your Mac in Windows.
- From File Explorer, open the USB flash bulldoze, then open Setup or setup.exe, which is in the WindowsSupport folder or BootCamp binder. When you lot're asked to allow Boot Camp to make changes to your device, click Yes.
- Click Repair to begin installation. If you become an alarm that the software hasn't passed Windows Logo testing, click Continue Anyhow.
- Subsequently installation completes, click Finish, then click Aye when you're asked to restart your Mac.
Learn more
If you tin can't download or save the Windows support software:
- If the banana says that the Windows support software could non exist saved to the selected drive, or that the USB flash bulldoze tin can't be used, make sure that your USB wink drive has a storage capacity of at to the lowest degree 16GB and isformatted correctly.
- If the assistant doesn't see your USB flash bulldoze, click Go Dorsum and make sure that the drive is continued directly to the USB port on your Mac—not to a display, hub, or keyboard. Disconnect and reconnect the drive, and so click Continue.
- If the assistant says that it can't download the software considering of a network trouble, make certain that your Mac is connected to the Cyberspace.
- Make certain that your Mac meets the system requirements to install Windows using Boot Camp.
If a Mac characteristic still doesn't work after updating the Windows back up software, search for your symptom on the Apple support website or Microsoft back up website. Some features of your Mac aren't designed to work in Windows.
Information almost products not manufactured past Apple tree, or independent websites not controlled or tested by Apple tree, is provided without recommendation or endorsement. Apple assumes no responsibility with regard to the choice, performance, or use of third-party websites or products. Apple makes no representations regarding third-party website accuracy or reliability. Contact the vendor for boosted information.
Published Appointment:
Boot Camp Download for Mac Os X 10.6.8
Posted by: moreheadpargety.blogspot.com


0 Komentar
Post a Comment